Upload
depreciated function
This function is depreciated due to the ease of emailing documents to the OCR queue rather than uploading.
The Upload Page & Process
The upload page differs slightly between desktop and web simply because a folder browser is not available in the web.

Document Type
The first thing you must do is select a valid Document Type from the list of available types. This can be restricted with one of the system settings:

Batch ID
The batchID will be automatically generated by the system for you when you open the screen.

The Upload Process
It is important to understand that the screen will behave slightly differently in desktop and web.
-
In desktop clicking on browse / upload will open the folder browser for you.
-
In web you must enter the folder location first.
In both web and desktop the system will remember the last folder location that you opened.
In web the folder location is automatically entered in the directory input for you:

In desktop this is the folder that will open by default when you hit the browse button:
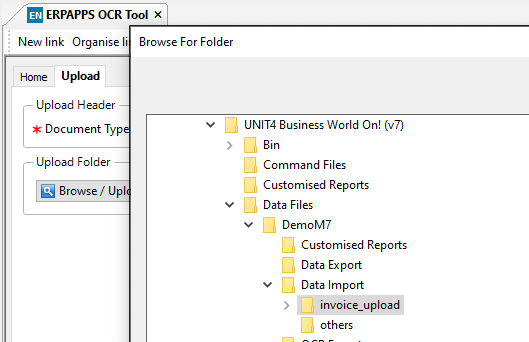
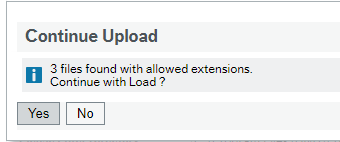
When you select the folder (desktop) / click upload (web) then the system will check the number of files in a valid format (jpg, pdf, png) and then ask you if you want to proceed with the upload.
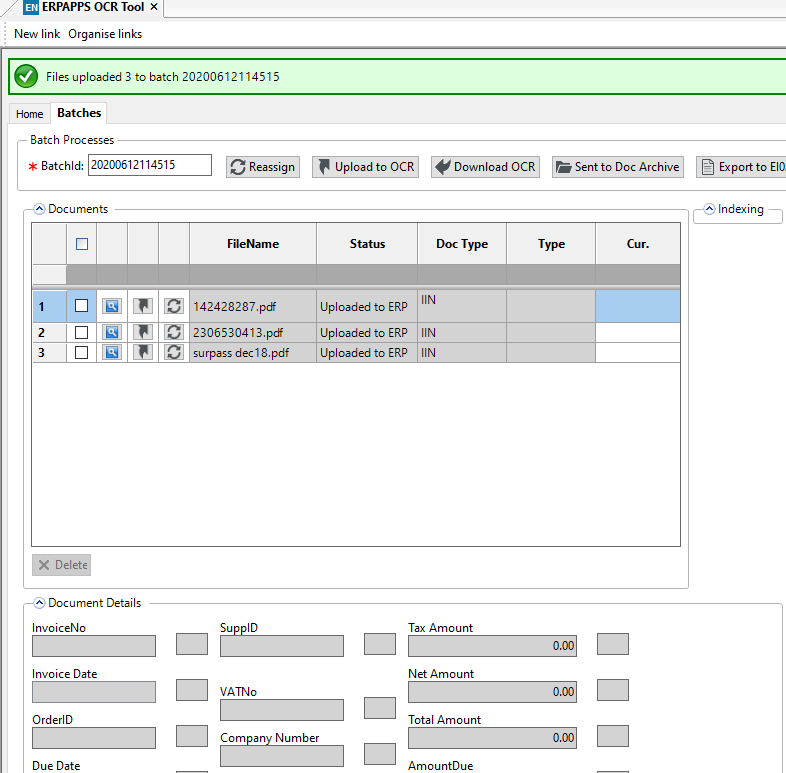
What happens next will depend on your system settings. The files will either simply be uploaded into the database ready for further processing or if the autoocr option is set then the system will automatically upload these to the OCR system for you.
Regardless of the setting you will be shown the batch page for the batch you just uploaded.
No auto OCR:
With auto OCR:
